Don’t be Shockingly Confused

Bad puns aside, simple car maintenance and repair is something that’s more difficult to teach with the advancements of technology and the desire to have most tasks handled by professionals. Even so, it’s important to know some basic maintenance items in order to avoid the pitfalls that can happen on the road. Do you want to shell out money to have an emergency service start your vehicle when your battery goes dead in a parking lot, or would you rather be ready and capable of doing this yourself? If you want to know how to jumpstart your own vehicle, keep reading and learn how.
Jumper Cables – Buy the right jumper cables to get the job done. Having any cables is better than none at all, but if you’re buying a new set, buy some that are 4 to 6 gauge and are at least 20 feet long. These are heavier duty cables and offer a better passage of the electrical current into your battery during the jump start process. Because you won’t always be able to get your vehicles right next to each other you need to have longer cable to reach the connects from one vehicle to the other.
No Touching – It’s important to remember you don’t want the two clamps to touch when you’re using jumper cables. If you can, have one person at each end of the cables to make the connections correctly and keep the clamps from touching each other. If you allow the clamps to touch when connected to the good battery, you could short out the vehicle and cause dangerous sparks as well. This could lead to having two vehicles on the side of the road or in the parking lot with dead batteries rather than just one.
Setting Up – Make sure both vehicles are as close as possible and the batteries are also as close as possible. Not all batteries are on the same side of the engine bay and even some are located under the back seat or in the trunk. It’s important to know where the battery is when you get set up to jumpstart a vehicle. Once you’ve put the two vehicles as close as possible with the batteries close together you can begin connecting the cables to ensure you’ll have the ability to get the dead battery powered up.
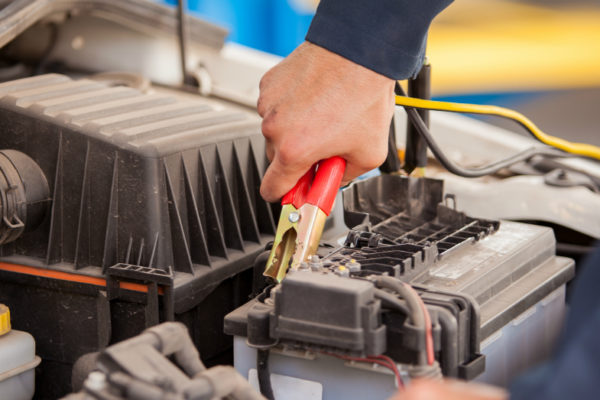
Connect the Cables – This is the most important and for some the most nerve wracking part of the process. You want to start with the positive pole of the dead battery and connect the red cable to that post. next connect the red cable to the positive pole of the charged battery. Next connect the negative pole in the good battery using the black cable. In order to make the final connection and a safe one, don’t use the negative pole on the battery, it’s better to secure this clamp to an unpainted engine bolt or a part of the frame. This will help keep you out of harm’s way and connect up the vehicle properly.
Start it Up – Start the engine of the good vehicle first and let it run for a few seconds. Once this time has passed try and start the vehicle that has the dead battery, and see if it runs. If it does run, you should let it remain running for a little while to get the battery charged up and remove the jumper cables in the reverse order you attached them. If all you hear is a clicking noise but the interior lights come on, you could be dealing with a bad starter or other issue which may need to be looked at by a professional mechanic.
This post may contain affiliate links. Meaning a commission is given should you decide to make a purchase through these links, at no cost to you. All products shown are researched and tested to give an accurate review for you.